CAD design

How to use Solidworks for free.

HOW TO USE SOLIDWORKS FOR FREE Online

Solidworks is one of the most useful CAD in the industry. Thus, many schools and universities use Solidworks to train students. Besides, there are many people trying to learn this application because it is a required skills, fun and mainly a most powerful. However, Solidworks license is quite expensive for personal use and many people cannot afford it. Fortunately, we can test and use Solidworks for free. In this article, I will show you how to use Solidworks for free step by step. If you want to know other existed free CAD software, I have a list of the top 5 free powerful CAD software you can use.

So, let’s get started.

To have the access of free Solidworks, what you need are an Internet, a device with an Internet browser. Recommended Internet browser are Google chrome or Safari.

First, open your browser and search on Google mysolidworks and go to this site

Signup in mysolidworks

After that, signup. You can find the signup link on the top right of the website.

Then, follow these 6 steps carefully.

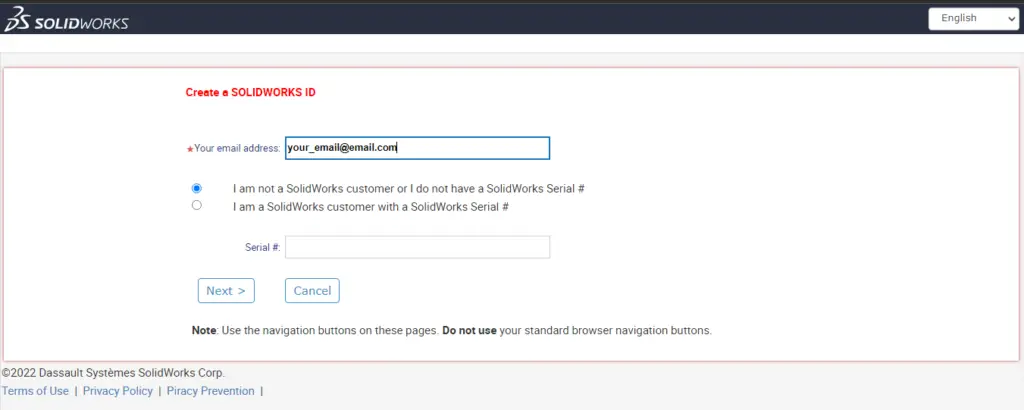
1. Provide your e-mail address and check I am not Solidworks customer or I do not have Solidworks license. In case you have Solidworks license or Solidworks customer, you will check the second one and put your license in the filling box bellow. Then, click Next

Provide email

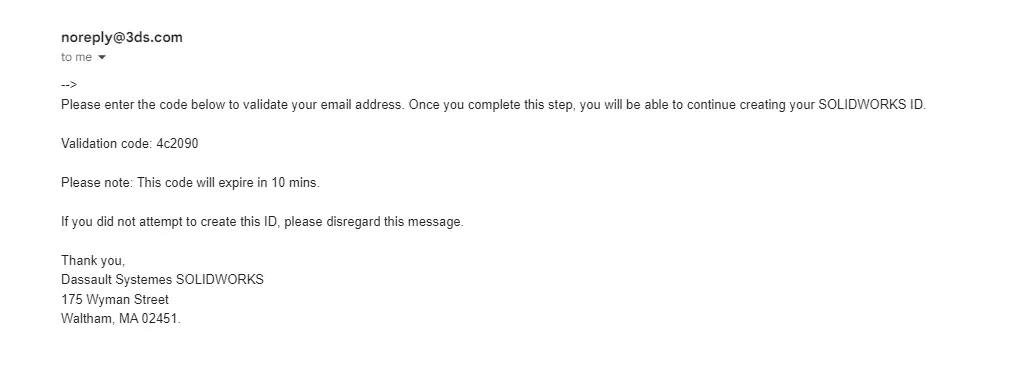
2. Go to your e-mail address and copy the validation code you receive. You will get this validation code instantly. In case you encounter any error during the process of signup, go back to this step to request a new validation code.

Validation code

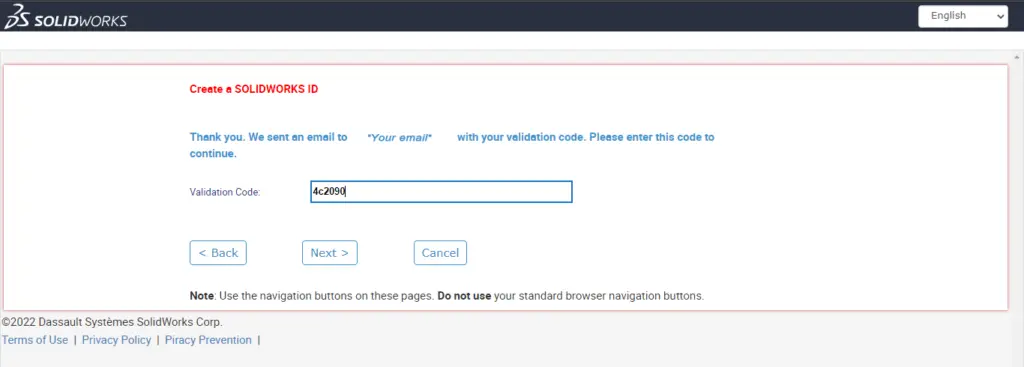
3. Paste it to the validation code area and click next.

paste validation code

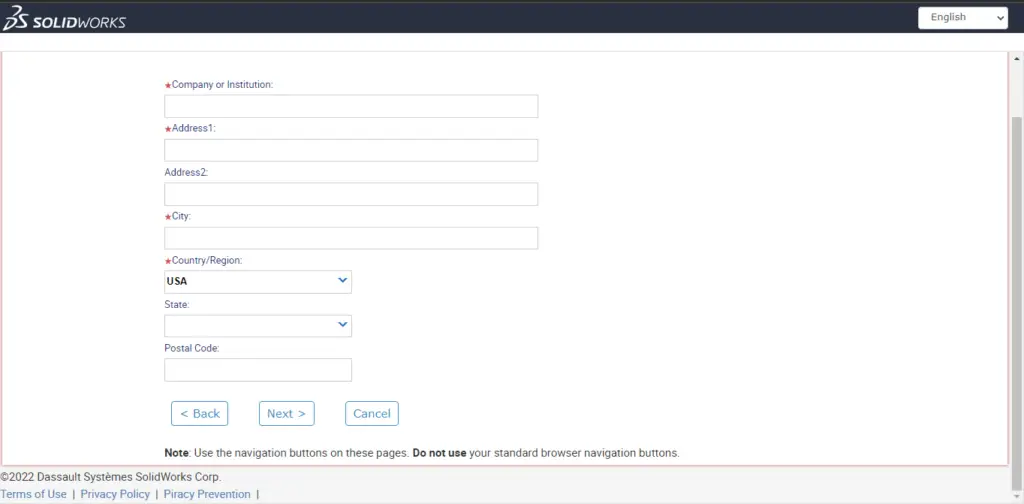
4. Next, provide the information, including your institution/company and physical address.

About you

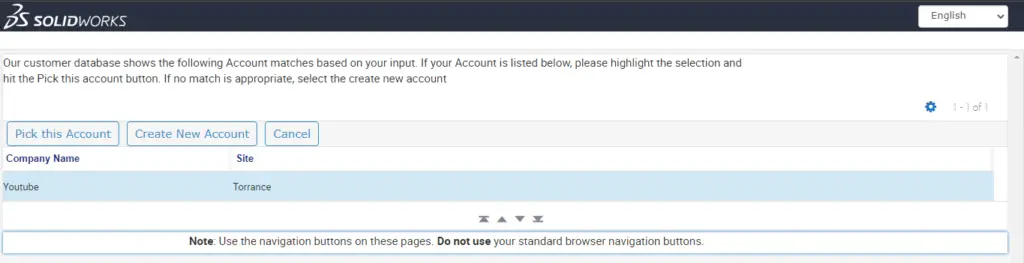
5. After that select the account you have created in the previous form and click on pick this account

pick an account

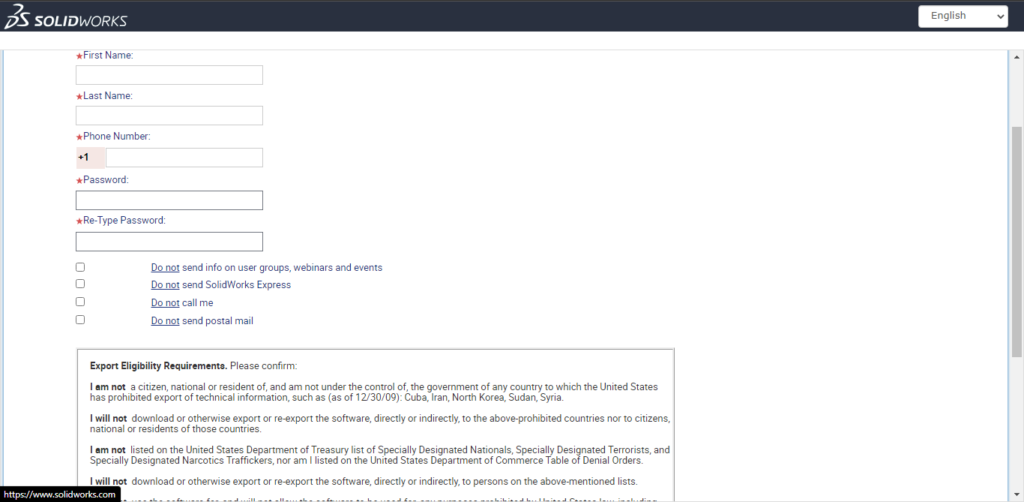
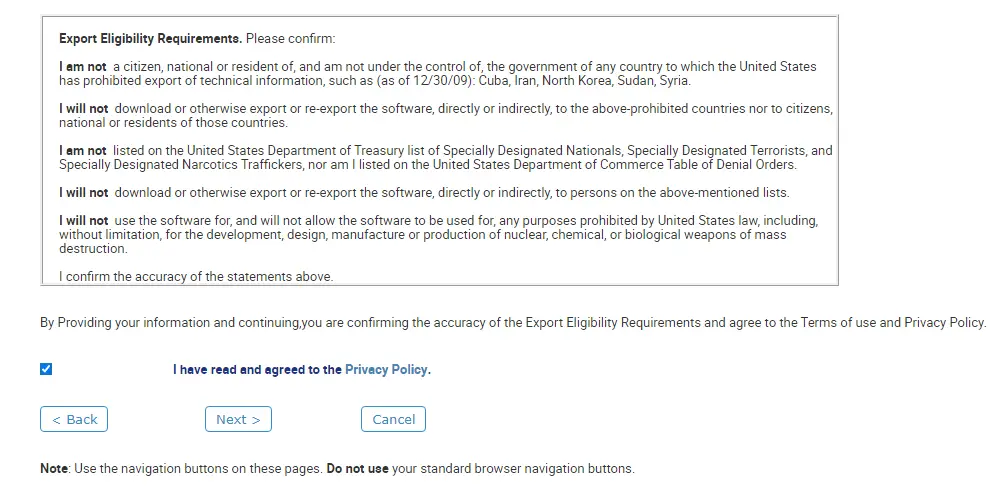
6. This is the last step. You fill out forms about yourself and create a password. Read Solidworks Privacy policy and check that you agree.

Then click next.

More about yourself
Privacy policy

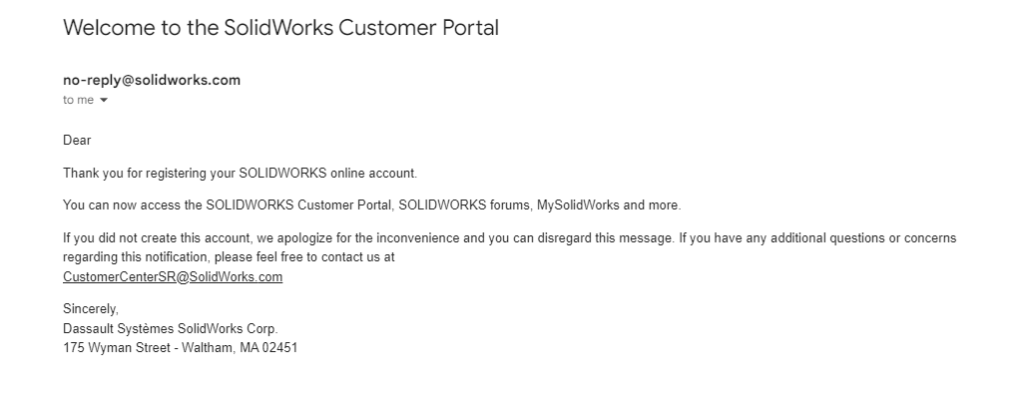
After that, you will receive a welcome email to confirm that you register to Solidworks online account.

welcome email

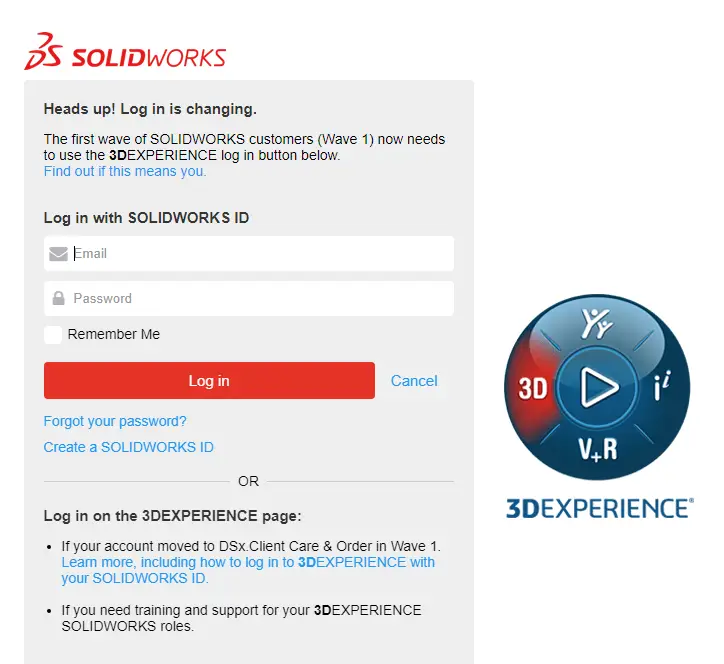
Therefore, you can log in to try Solidworks online and use it for free. You can see login next to signup on the top right of the main page. Use the e-mail address you use to register and put your password and login.

login with solidworks

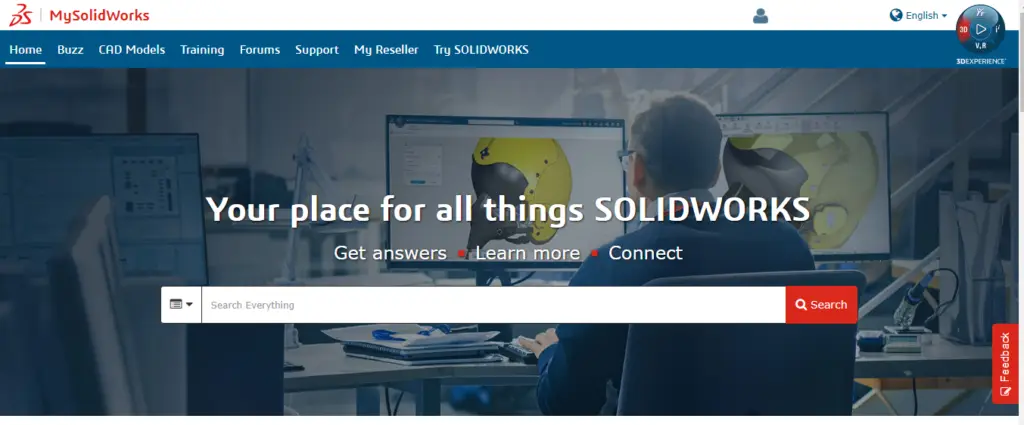
After login, click on “Try SOLIDWORKS” menu

Try Solidworks

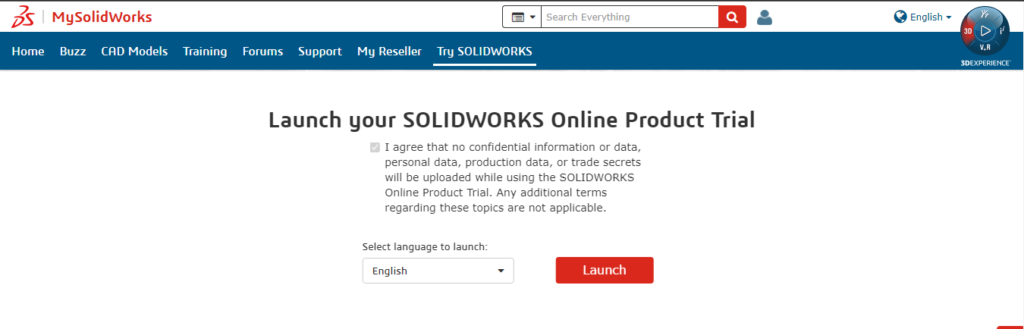
Then scroll down to the next section after the header, check the agreement, choose language you want and Launch Solidworks.

launch online solidworks

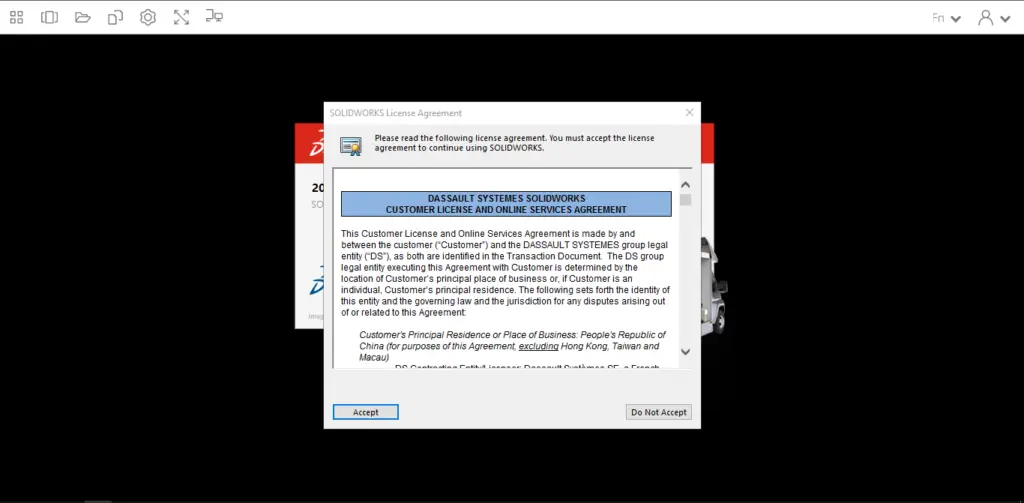
Wait until Solidworks launch. While launching, there is a license agreement that will pop up. Click accept and Solidworks will open

Solidworks license agreement

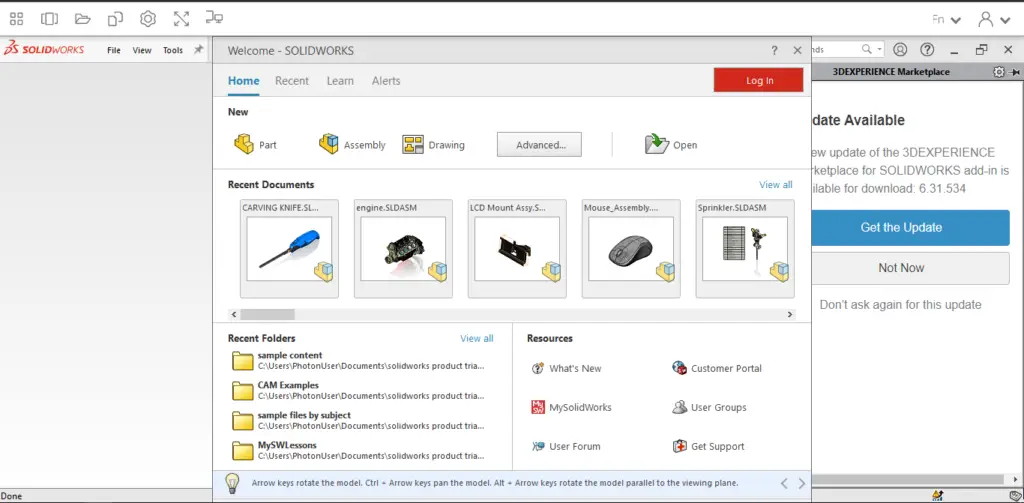
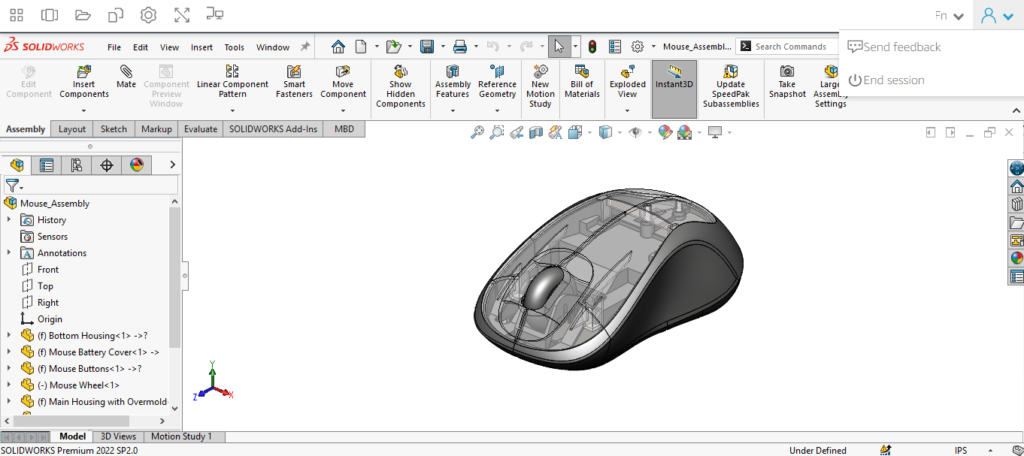
Finally, you have access to Solidworks. You can fully test Solidworks for free with all functionality, features, and news.

Congratulations.

Solidworks launch succesfully

Bonus.

You may ask if you can import external Solidworks files to online Solidworks. And, you may also ask if you can save the project you made to your local device.

The answer is YES. And I will show you how to do it

Model example

First, let us start with process of saving the project you worked on Solidworks trial to your local device.

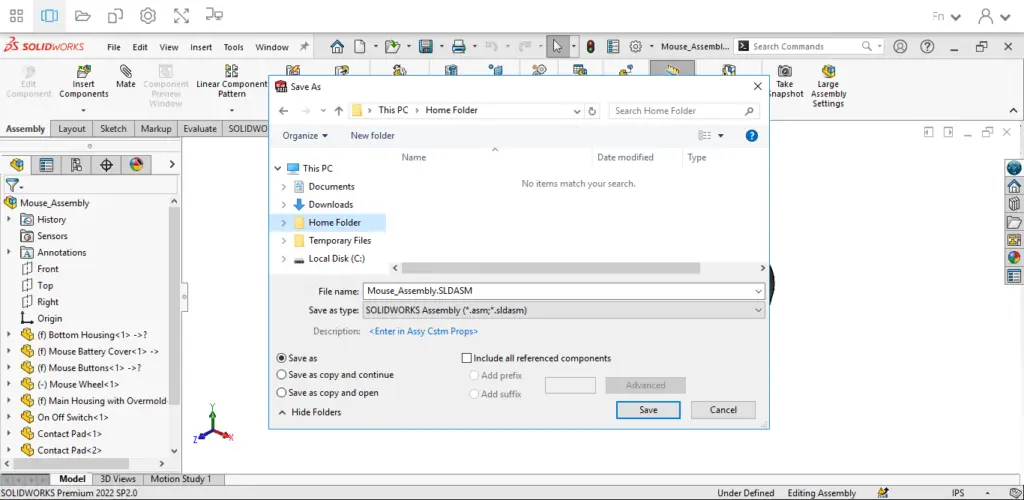
1. Save your project. Go to file/Save. Save it in “home folder” or “template folder”.

Save to home folder

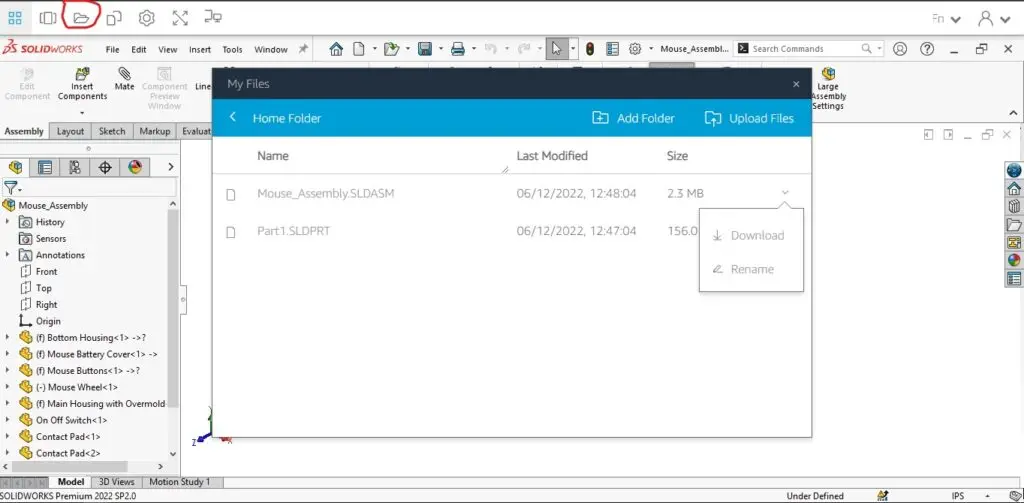
2. Then, click on the “My files” (As shown in the pictures below) menu of the launcher. Go to the folder you saved the file previously by double-clicking on it. After that, click on the “arrow down” on the right of the file you want to save locally and click download.

Specify the download path on your device, and you have your design saved locally.

My files

Second, if you want to import your file from your device to be used on the Solidworks trial, follow this step.

1. Go to “my files”/ Upload files. You can see the upload files button on the top right of my files dialog box.

2. After that, browse to the file you want to import from your device, then open

Solidworks file in local device

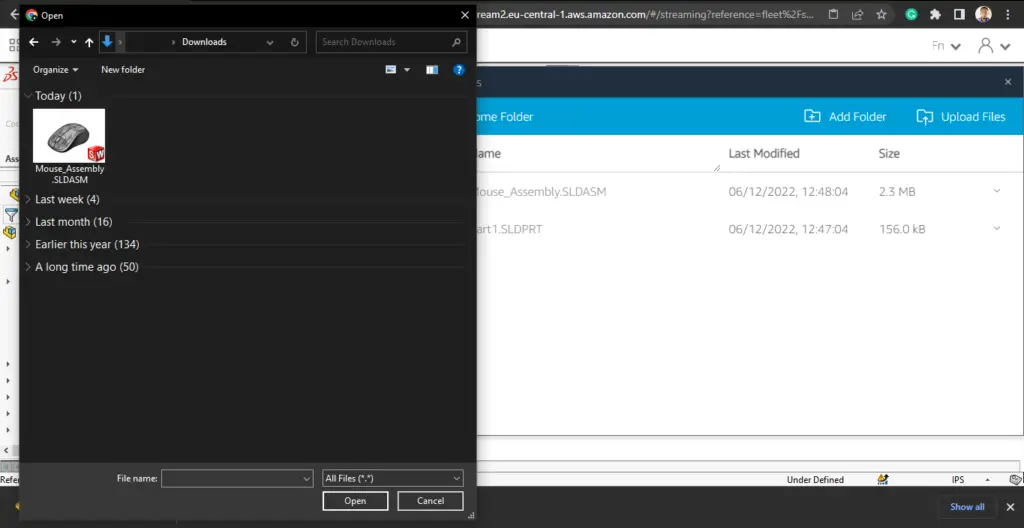
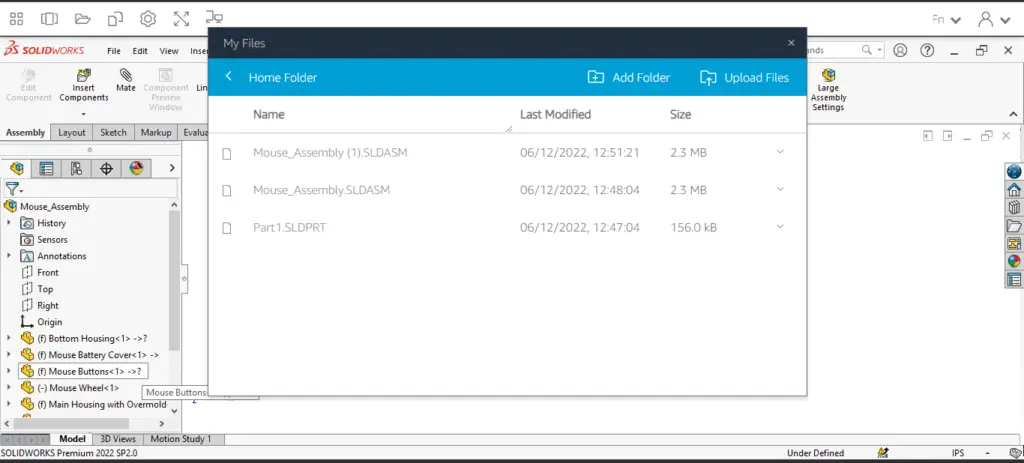
3. You have your files uploaded. 

Then you can just go to your working area. Go to file/open. And open the file you have just uploaded.

Uploaded files

There is a video available here to show this step by step.

Enjoy it and hope you discover something when you try Solidworks online.

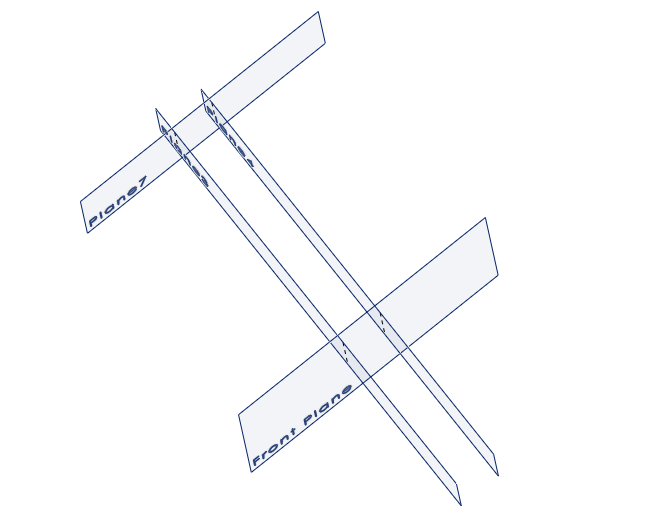
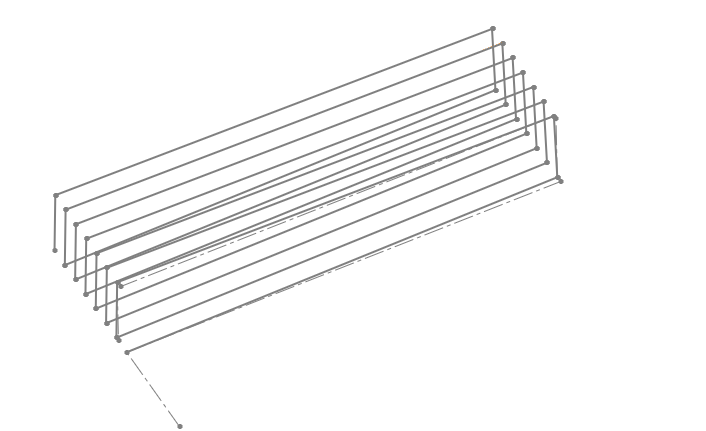
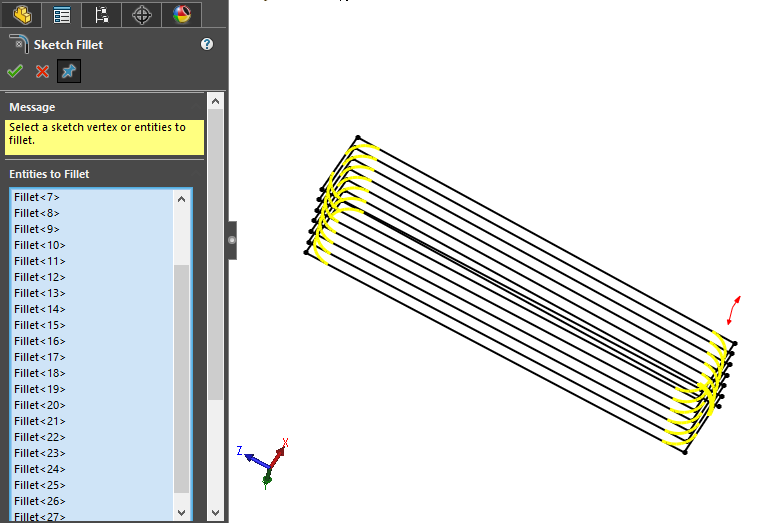
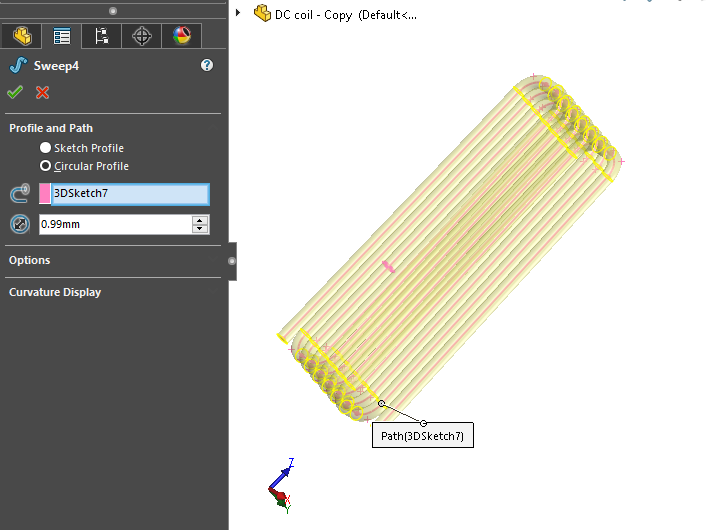
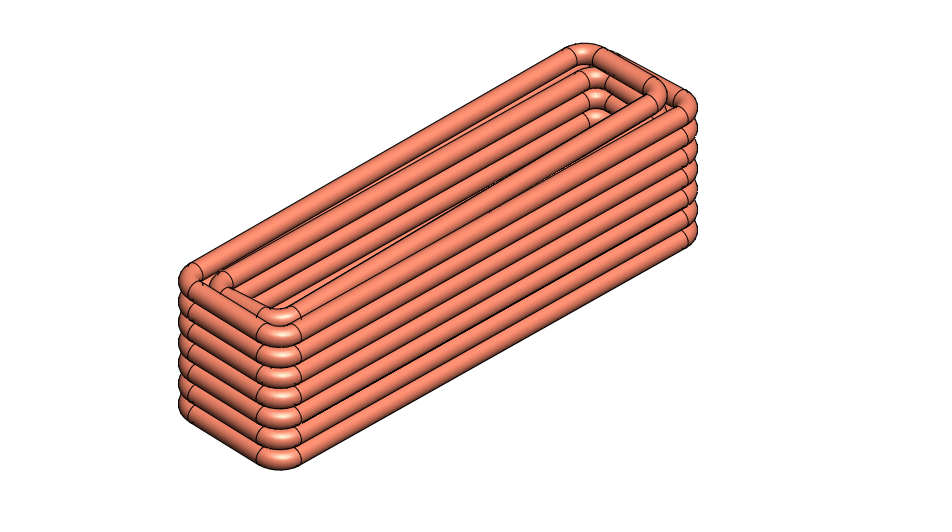
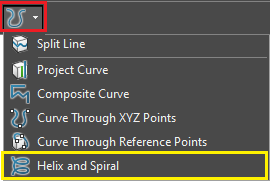
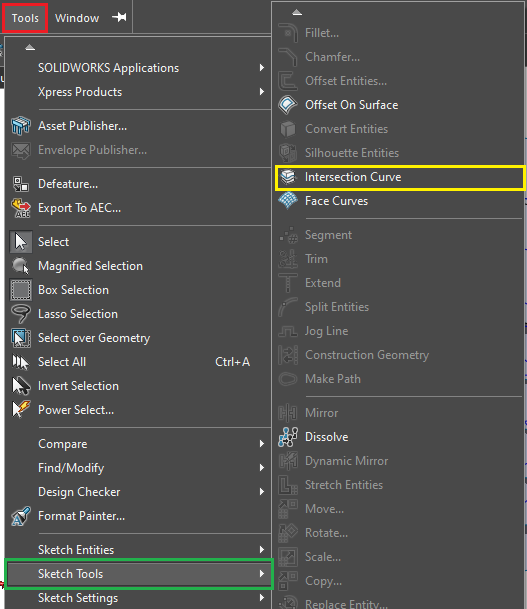
To start with you can design a spring by following this step-by-step tutorial.
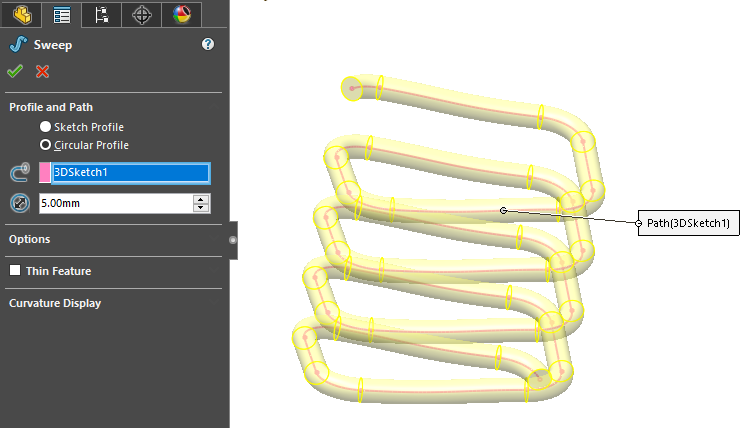
How to use Solidworks for free. Read More »

Industrial and Mechanical Designers

Industrial vs Mechanical designer


It is a common subject to get the difference between Industrial and Mechanical designers regarding their tasks. Therefore, many people are confused about it. Although this struggle, there are a few differences between these two jobs. And I will state to you in this article my point of view about it according to my personal experiences.


The similitude of the two designers

Firstly, both disciplines are very important in the industry. And it is common knowledge that a person who is good at Industrial design will not force to be good at Mechanical design. And vice versa. However, an Industrial designer should have knowledge of Mechanical design. And vice versa. Hence, the two skills are complementary.

Secondly, the tools and software that both skills need are almost the same. Designers need Computer-Aided Design (CAD) software such as Solidworks, Catia, Autodesk Inventor, Fusion360, Onshape, PTC Creo, Siemenx Nx, …etc. to do their tasks with computers and to deliver a very good design. There is some free CAD software that fresh designers and students can use. Even though designers have computers to do design nowadays, it is very important to remember to design by hand using all hand tools like pencils, pens, ink pens, squares, protractors, circle drawing compass, …etc. Hand drawing is one of the basic knowledge, and it might help in solving some issues.

Moreover, both designers can use Other 3D software to develop a product, and for motion study. Software like Sketchup, Blender3D, 3ds max, Cinema 4D, Zbrush …etc.


The contrast between Industrial and Mechanical designers

These are specific tasks between Industrial and Mechanical designers. The main thing between both skills are:

Mechanical designers focus more on the mechanism whereas Industrial designers focus more on the industry.

What does it mean?

When mechanical engineers do a design job, they will think mainly about the mechanism. So design reflects more on the mechanical aspect. They always think about how it really works mechanically. Designs are based more on calculation, and some analysis. Mechanical designers provide high details drawing. Besides, they should be able to explain the mechanism of the system. Therefore, mechanical designer design and develop something moveable such as machine design, engine, and automotive…etc.

On the other hand, Industrial engineers think already about the industry when they have or receive some design project. they already think about how can they produce it and how efficiently are design they do. They think more about the aesthetic of the product and the use of the product. Hence design they do tends to thes matter. Industrial designer design and develop something non-moveable like furniture, appliances, …etc.


Industrial and Mechanical Designers Read More »

Rectangle spring in Solidworks | 2 methods.

Solidworks is one the most powerful CAD software that most people and companies use. Beginners and even experts sometimes have a hard time finding some functionality or features to design something. For example, creating non-circle coils. So how to create a rectangle spring in Solidworks? I will give 2 step-by-step methods for it.

I have made this guide because I needed to create a rectangle spring in Solidworks on my project. However, we can get a helical sketch in Solidworks only from only a circle. Hence, I try to find one on YouTube and I found a lot of tutorial about it. Unfortunately, my computer is always stuck when doing it. Therefore, I try to find another method of creating it.

12V DC motor with rectangle coil in solidworks

So let’s get started.


1st method: Extract the rectangle helical sketch from a circle helical surface to generate the rectangle spring in Solidworks

The first method is almost used and taught by many designers. Here is some of the best guide to it. But here is how I will proceed on it.

  1. Create a rectangle sketch in one plane and extrude it for the length you need (and add fillet),rectangle profile in Solidworks
  2. Create a circle in the center/bottom plane of your rectangle (not bigger than the main surface) and use Helix/Spiral command to create the coil sketch. Choose the right setting for your spiral which includes height, pitch, revolution, …etc.Helix/Spiral command in Solidworks
  3. Create a line at the end of the coil sketch and normal to it. This line should cover the volume of the rectangle,
  4. Go to Surface/sweep to create a surface coil. Use the line as profile and spiral as the path.Sweep surface in Solidworks
  5. To extract the rectangle Sketch, go to the menu Tools/Sketch tools/ Intersection curve. Then Select all surfaces and OK.Intersection curve function to generate 3D sketch spring path in Solidworks
  6. Finally, you have your Rectangle 3D sketches. Go to Features/sweep. Choose a circular profile and use the 3D sketch as a path and define a diameter.Rectangle sprin in Solidworks. 1st method

The main advantages:

  • Quicker with high specs workstation
  • It can generate many other types of shapes such as cone, sphere spring, …etc.

A disadvantage:

  • It is not efficient for low specs laptop or desktop

Depending on your need, you can choose this first method for your purpose.


2nd Method: Generate 3D non-circle sketch from 2D sketches to generate the rectangle coils in Solidworks

These are the main steps for the 2nd method

  1. Create 4 planes that limit your rectangle. Tips: always create it from the center.create new alternative plane in solidworks
  2. Start sketching in the first plane and do the sketch as shown in the pictures below. Before doing the sketch, choose all of your helix parameters in advance regarding mainly the pitch and revolution. Then pattern it from the revolution you have chosen.
  3. Then choose the next plane perpendicular to it and sketch the other line. Proceed like the 2nd step.
  4. After finishing sketching the 4 planes, verify it. All lines should coincide with each other apart from the start and end.Conicidence verification. 3D sktech path spring in solidworks
  5. Next, create a new 3D sketch, and choose all lines you have created by using the Convert entities command. Add fillet in the 3D sketch.Derived sketch and filleting
  6. Finally, you have your Rectangle 3D sketches. Go to Features/sweep. Choose a circular profile and use the 3D sketch as a path and define a diameter.

The main advantages:

  • Nothing new to creating the 3D sketches
  • This method is more convenient to create multiple-stage coilsMulti-stage rectangle coil in Solidworks

A disadvantage:

  • Spending more time using this method.

That is all I have discovered about this design. If you need more clarification in creating, please follow the tutorial video above so that you are not lost in each step.

Hope you enjoy this guide and you find it useful in your project.

Do not hesitate to leave comments for feedback.


Rectangle spring in Solidworks | 2 methods. Read More »

Get started with FreeCAD

FreeCAD is one open-source software most use. Many of these posts are very useful, especially in some specific areas. One of the useful posts and help can be found on the FreeCad wiki. So let’s get started in using FreeCAD.

  • Get started with the FreeCAD interface

Basically, you can see all of the menus on the top of the software. In the menu, there is everything. Also, you can see the most common shortcut like a new project, save button,… etc. just under the menu.Interface of FreeCAD

One of the main things to remember when working with FreeCAD is the existence of Workbenches. In workbenches, you will see all tools you will use. In this guide, we will focus only on 3 workbenches including Sketcher, Part, and Part design. The workbench selector is here.Workbench list with freecad


  • Sketch with FreeCAD

When using CAD design, especially 3D CAD, Design should start with Sketch. The sketch will be designed in the 2D plan. To get access to sketch, go to Workbenches/Sketcher.

So how does the Sketcher workbench look likes?Sketcher interface with Freecad

In the Sketcher, you can see all basic geometry shapes including lines, arc, circles, rectangle, polygon, …etc. In addition, there is also the adjuster in the sketch workbench.

One most important of CAD software is the use of dimension and geometry relation. So Always use this command when doing designing.

Sketcher also has a pattern and mirror in each function.

So basically the process of using sketcher workbench are:

  1. First, choose the plane to sketch
  2. Create your 2D sketch
  3. Make sure to create one closed design and full defined
  4. Then exit (close)
  • Part design with FreeCAD

Part design is used to generate the 3D from 2D.

Get started with FreeCAD Read More »

Skip to content