Spring

Spring with taper profile in Solidworks

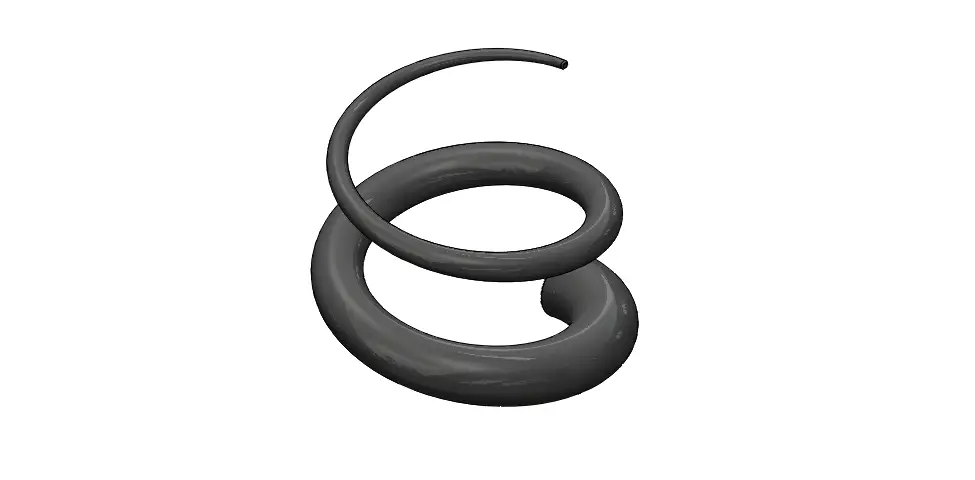
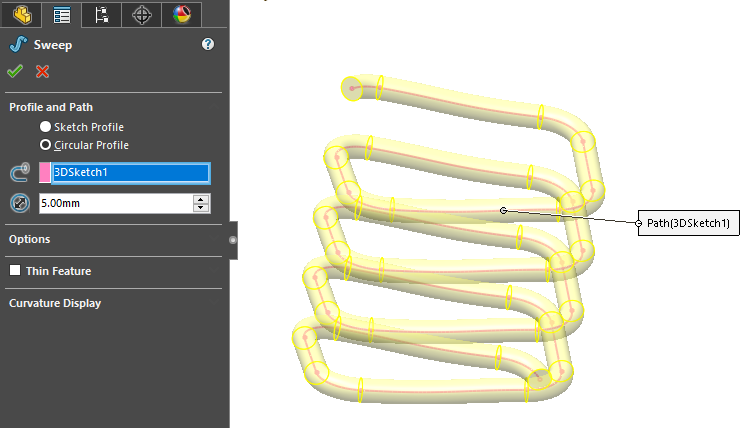
Creating spring with taper profile is quite tricky with Solidworks. Sweep feature does not have yet an option of taping the profile while using circle as profile. 

Fortunately, it is possible to create such a design by using a loft feature. I will show you the main step of it. 

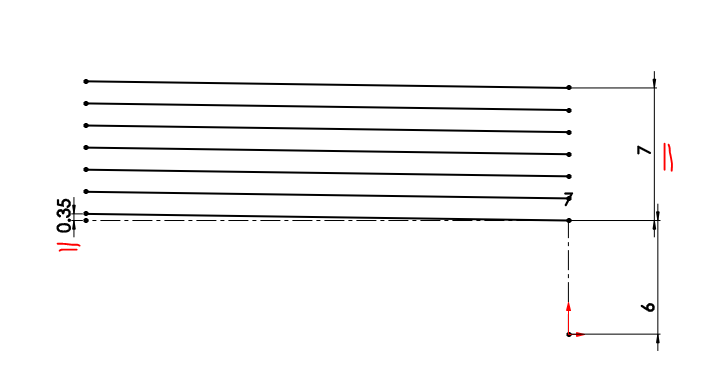
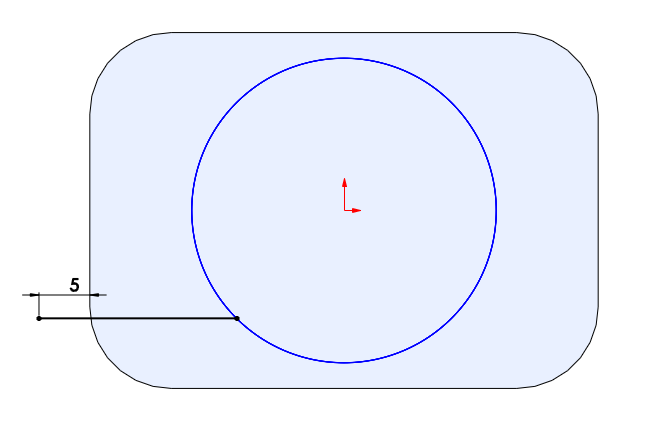
1. Create the base Sketch of helix

base sketch

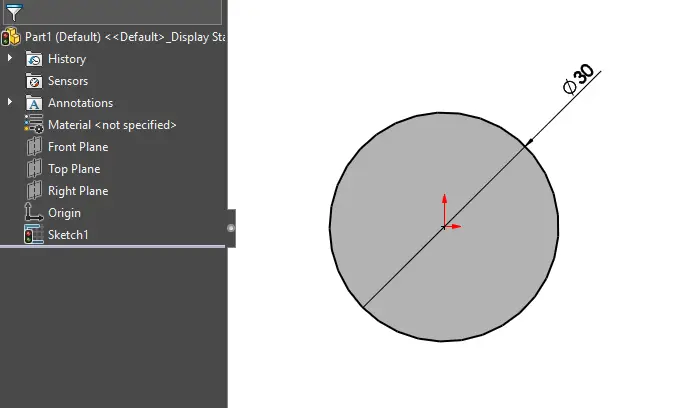
Choose a working plane such as Top plane and sketch a circle that you will use for helix path.

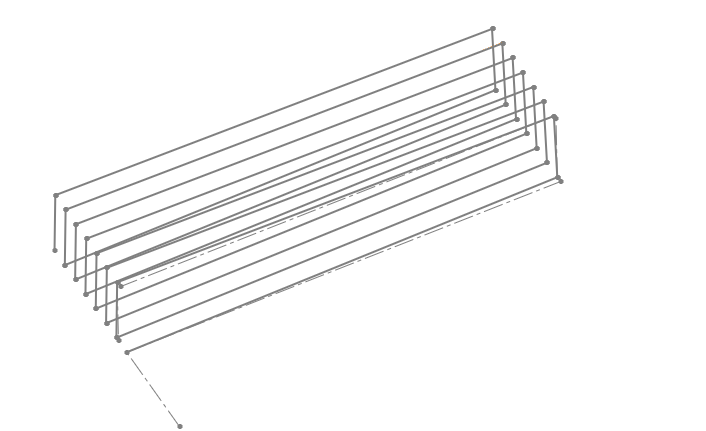
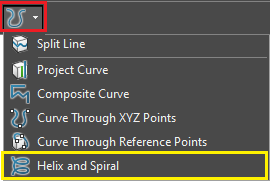
2. Create the helix path

Helix path

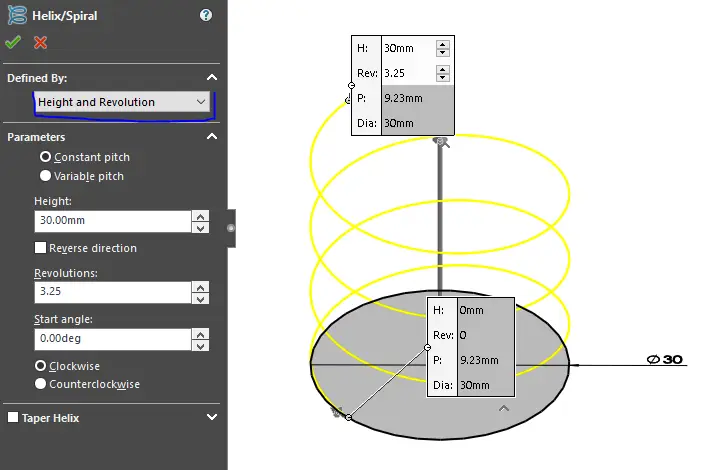
Create the helix from the circle base sketch by using helix function. Put all needed parameters you need to create your helix. In my case, I have chosen height and revolution as a based definition. You can have a look at creating rectangle spring to know some details of where to find the helix and spiral function. You can check also this Youtube video for a basic knowledge of Helix and spiral.

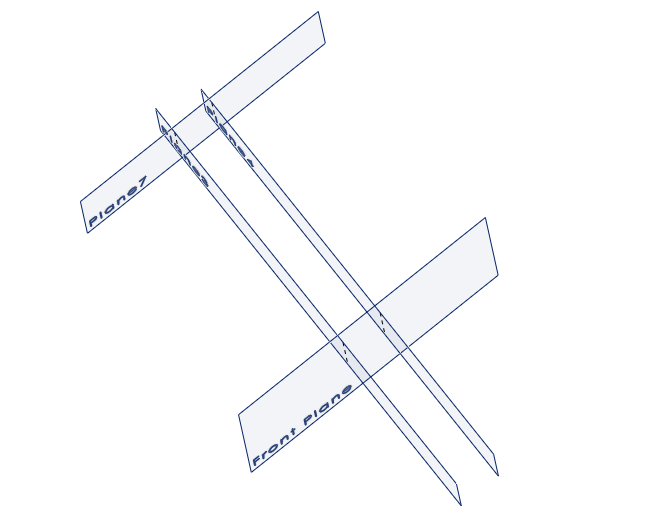
3. Create the first profile

first circle profile

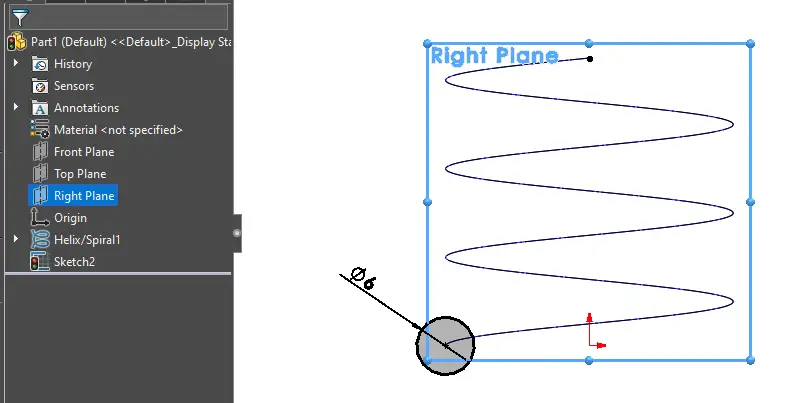
Choose a plane normal to the start of the circle and create your first circle profile. In my case, the first start of the helix is normal to the right plane. So I chose the right plane to draw the first circle. Draw it to the center point of the path. To get that center point, derive the 3D helix.

4. Create the second profile

2nd cirle profile

Like the previous step, draw the second profile to the normal plane of the end of the helix path. In my case, the front plane is the normal plane of the end. Note that I have chosen 3.25 as the number of revolution in order to have different normal drawing plane of the 2 profile. But in most cases, the normal plane of the 2 profile is the same.

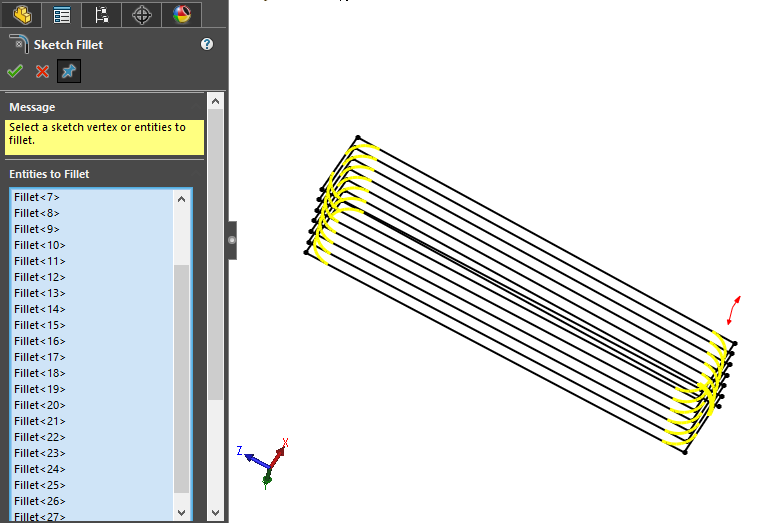
5. Create the spring with Loft

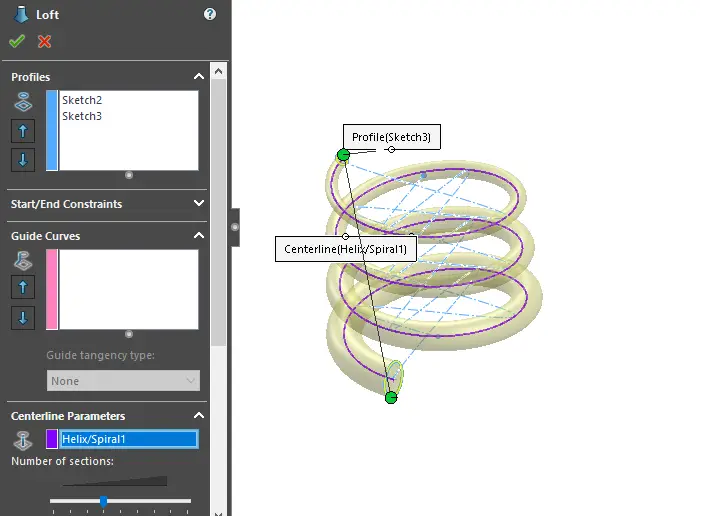
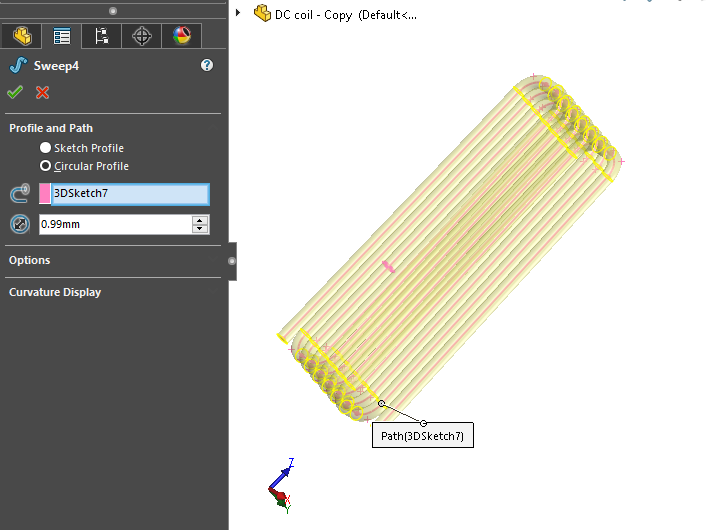
Last step, use loft feature to join the 2 different profile sketch. As we draw the profiles to the center of start and end of the path, we will put the helix path as centerline parameters.

So instead of guide curves, use Centerline parameters.

Taper helix

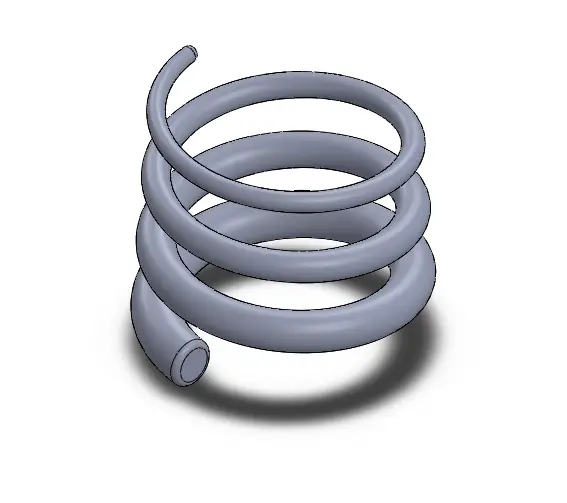
Now you know how to create this kind of spring. It seems simple, but sometimes we have a struggle in using some option on Solidworks features. 

Keep practicing and see you next time.

Spring with taper profile in Solidworks Read More »

Rectangle spring in Solidworks | 2 best methods.

Solidworks is one the most powerful CAD software that most people and companies use. Beginners and even experts sometimes have a hard time finding some functionality or features to design something. For example, creating non-circle coils. So how to create a rectangle spring in Solidworks? I will give 2 step-by-step methods for it.

I have made this guide because I needed to create a rectangle spring in Solidworks on my project. However, we can get a helical sketch in Solidworks only from only a circle. Hence, I try to find one on YouTube and I found a lot of tutorial about it. Unfortunately, my computer is always stuck when doing it. Therefore, I try to find another method of creating it.

12V DC motor with rectangle coil in solidworks

So let’s get started.


1st method: Extract the rectangle helical sketch from a circle helical surface to generate the rectangle spring in Solidworks

The first method is almost used and taught by many designers. Here is some of the best guide to it. But here is how I will proceed on it.

  1. Create a rectangle sketch in one plane and extrude it for the length you need (and add fillet),rectangle profile in Solidworks
  2. Create a circle in the center/bottom plane of your rectangle (not bigger than the main surface) and use Helix/Spiral command to create the coil sketch. Choose the right setting for your spiral which includes height, pitch, revolution, …etc.Helix/Spiral command in Solidworks
  3. Create a line at the end of the coil sketch and normal to it. This line should cover the volume of the rectangle,
  4. Go to Surface/sweep to create a surface coil. Use the line as profile and spiral as the path.Sweep surface in Solidworks
  5. To extract the rectangle Sketch, go to the menu Tools/Sketch tools/ Intersection curve. Then Select all surfaces and OK.Intersection curve function to generate 3D sketch spring path in Solidworks
  6. Finally, you have your Rectangle 3D sketches. Go to Features/sweep. Choose a circular profile and use the 3D sketch as a path and define a diameter.Rectangle sprin in Solidworks. 1st method
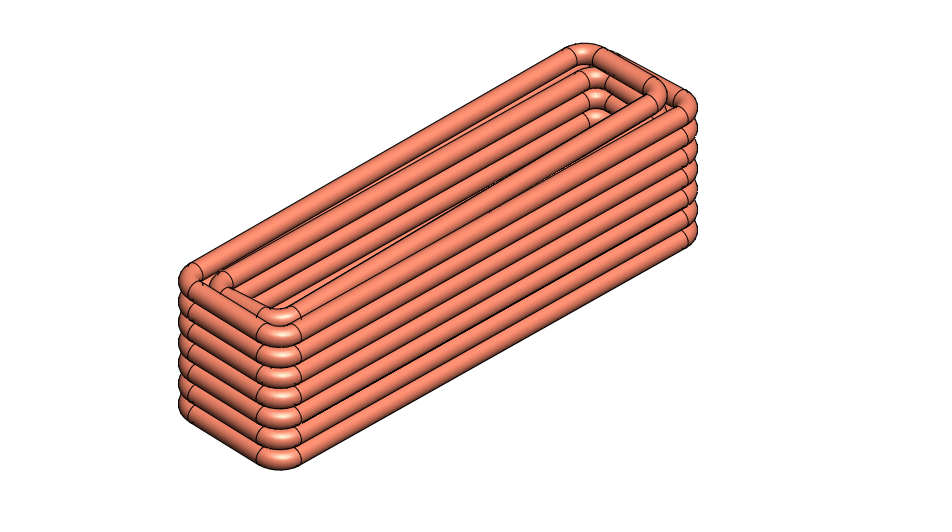
Your rectangle spring is done.

The main advantages:

  • Quicker with high specs workstation
  • It can generate many other types of shapes such as cone, sphere spring, …etc.

A disadvantage:

  • It is not efficient for low specs laptop or desktop

Depending on your need, you can choose this first method for your purpose.


2nd Method: Generate 3D non-circle sketch from 2D sketches to generate the rectangle coils in Solidworks

These are the main steps for the 2nd method

  1. Create 4 planes that limit your rectangle. Tips: always create it from the center.create new alternative plane in solidworks
  2. Start sketching in the first plane and do the sketch as shown in the pictures below. Before doing the sketch, choose all of your helix parameters in advance regarding mainly the pitch and revolution. Then pattern it from the revolution you have chosen.
  3. Then choose the next plane perpendicular to it and sketch the other line. Proceed like the 2nd step.
  4. After finishing sketching the 4 planes, verify it. All lines should coincide with each other apart from the start and end.Conicidence verification. 3D sktech path spring in solidworks
  5. Next, create a new 3D sketch, and choose all lines you have created by using the Convert entities command. Add fillet in the 3D sketch.Derived sketch and filleting
  6. Finally, you have your Rectangle 3D sketches. Go to Features/sweep. Choose a circular profile and use the 3D sketch as a path and define a diameter.

The main advantages:

  • Nothing new to creating the 3D sketches
  • Design is very clean
  • It is better to use this method for visualization purpose
  • This method is more convenient to create multiple-7layer coilsMulti-stage rectangle coil in Solidworks

A disadvantage:

  • Spending more time using this method.
  • Spring path is too straight, not like a regular spring path.

That is all I have discovered about this design. If you need more clarification in creating, please follow the tutorial video above so that you are not lost in each step.

Solidworks gives us a better tools to create such a simple design that seems too complicate. Rectangle spring designed are mostly used in electrical and electronic field. For example, a motor coil in rotor or stator. And, we need sometimes rectangle spring details in vizualisation.

Hope you find the above guide useful, and you will not get trouble again in creating rectangle spring or any other profile.


Rectangle spring in Solidworks | 2 best methods. Read More »

Skip to content